20′ Tipi for Sale from Spirit Tipis

Laura Briggs of Spirit Tipis reached out to me about a fantastic tipi she has for sale that’s all ready to go!

It’s a 20′ Tipi with Liner and door. Packaged and ready to send. the price is $1850. (The canvas alone cost $1,000.+) It was made with love and saved with love… so I am excited to see who gets it now.

I have a shop connected to my home which is in a tiny rural town; Skull Valley,  22 miles SW of Prescott  Az. I make Tipis to order, one at a time. They are custom made, and customers get to pick the color of the Leather and the Webbing used as reinforcements.

The picture is my personal, 18′ Tipi.The second picture is a 12′.
   

My phone numbers are:

Shop.  928-442-3225
Cell. 928-925-6298     

Address:P.O. Box 262
Skull  Valley,  Az.
86338       

Here are some more pictures of Laura’s work:

Whole Camp for Sale – 12×12 Panther Pyramid, Chairs, Blankets, Kitchen Goods, Clothes, and More

Wes Stewart is selling his whole camp and has pictures posted on his website of the items.

The camp includes the following items:

  • Panther primitive 12 x 12 pyramid tent, no mold, no tears, like new
  • Moccasins sz.12/13
  • Leather belt with period buckle
  • Shirt, multi-period kind of a one size affair, hand stitching
  • wool knit fingerless shooting mittens
  • belt carried cartridge bag, + small duffle (pillow sized)
  • Two wool blankets, folding stool
  • trousers fit wide size range, cinch at waist and legs
  • period looking mallet
  • another pair of moccasins, ~womens size 8
  • water skins
  • tent stake bag with many stakes, misc box with mardi gras coins
  • dish dry rack, kitchen box with plates, pots, pans, utensils
  • period looking utensils
  • dutch oven plus container
  • capotes, beaver skin, stockings, canvas fly, and the container
  • 2 solar bags
  • trestle table ~4ft long
  • 3 ladderback chairs
  • 2 not period, but look great in a camp with a canvas cover, Adirondack chairs.
  • fire ring (55 gal barrel)
  • Aerobed inflatable bed, mattress in canvas,period looking, tops the aerobed for great comfort

Pictures of most items are posted up on his site here.

Wes is requesting local pick up only due to size. He’s located 30 miles east of Dallas (Fate, TX), and is not parting out individual items.    He’s asking $1250 or best offer for all.

He can be reached at campsale@stewarthistory.info

Re-seasoning Cast Iron

I probably should say seasoning cast iron, but when you’ve had an old dutch oven sitting in a shed for the past 3 years, I think it’s more of a re-season.

Back in 2007 when Otter Woman and I were hitching up the wagon to our new encampment, we had quite a few projects that were “in progress” – one of which was an old cast iron dutch oven that we’d recently used at an event. Prior to the move we did our best to remove the petrified remains of my poor attempt at biscuits (fire hardened in the true sense of the word).

About two weeks after our move Little Otter was born and we sort of forgot about the pot. Over the next couple of years we day-tripped into events and the dutch oven slowly migrated around the garage, outside into the shed – and finally onto the back porch where I had to stare my lack of responsibility in the face every time the kids and I went in and out of the house.

To mark my triumphant return to overnight rendezvous’ing, I decided I would clean and re-season that old dutch oven once and for all . . .

Having no idea how to remove 3-year old biscuit carcass, I strolled over to the Interweb and did some searching. I found a few suggestions, blended some ideas and added a few of my own.

Here’s how it worked:

1. Removing the petrified biscuits

I did a few things here – one site recommend a mix of white vinegar and water, so I took a mix of this and with a piece of steel wool, went to town on the rust. As described, it worked out pretty well, but for the old biscuit fossils, I had to get at it with a small crowbar (seriously). After a lot of elbow grease, it finally removed the rock-like dough.

After all of this, I then washed the oven (lid and bottom) with dish soap and water to remove any residue from the operation. I also dried it with a cleaning towel to make sure there was no more water on it.

The dutch oven got a light surface rust immediately after drying, but I figured it would be no big deal after the greasing.

2. Warming the pan

Set the oven to 225 degrees. When the oven is ready, put the dutch oven and lid (separate on a cookie sheet) in the oven for 5 minutes to warm up. When it comes out, it’s plenty warm.

3. First coat of oil

Once the dutch oven was warmed up, I took it out (remember the hot pot holders, she’s warm!) and set the whole mess onto the stove. I took some vegetable oil (am sure bacon grease, or olive oil would probably be fine, too) and coated the whole thing – lid and bottom – and wasn’t shy about it.

After that, let it sit in the hot oven for 30 minutes.

4. Wipe and finish cooking

After 30 minutes, remove the dutch oven from the oven oven and wipe it dry. There may be some pooled oil on the bottom of the dutch oven and the corners of the lid. I used a wad of paper towel to hold each piece up and used another paper towel to dry the dutch oven and re-distribute the oil around it.

When this is done, the dutch oven goes back into the oven oven and cooks for 30 more minutes.

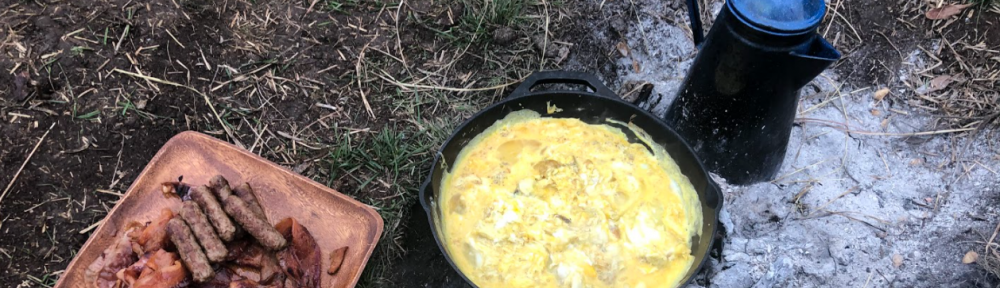
When I finally took the dutch oven out of the oven after the process it looked great. No more rust, no more bad spots – ready to try another attempt at biscuits and peach cobbler.

Even Otter Woman, who is the chief health inspector at our house gave it a passing grade.

Give it a try and you, too can bring back an old dutch oven from the dead!

A Tent with Walls

When I first got into the hobby, I – like many other single ‘skinners – did most of my camping with a diamond fly. If the weather was bad, the diamond fly was set-up like a lean-to, helping to keep the rain off of ‘skinner and gear. If the weather was good – sometimes the fly just acted like a regular tarp – something more or less like a sleeping bag cover.

The first time I brought Otter Woman with me to rendezvous, we did our camping in that same diamond fly. We went through a few camps, a serious thunderstorm, and the usual hassle of changing clothes in such a privacy-challenged set-up. It was after she had been coming out for about a year that she looked around at the other camps and asked the question that strikes fear into the heart of ‘skinners everywhere . . .

Why does their tent have walls?

It was an innocent enough question, and the one that got us into our first wedge tent. Being a stickler for authenticity, there is nothing easier to prove then the ubiquitous wedge tent. I went to my Panther Primitives catalog and ordered the smallest one they had – 6′ x 6′ x 4′.

To Otter Woman, this tent was a huge improvement over our previous lodge. Not only could she change in privacy (even if comfort left something to be desired), it would also keep all of our gear hidden and dry, and could almost fit two cots – almost.

Everything was fine and dandy until a few camps down the trail when again I found her looking into my eyes with longing and desire. Then she spoke those fateful words to me . . .

Why is their tent so much bigger?

Not to be undone by the size of another man’s lodge, I begrudgingly went back to the Panther catalog looking at their bigger wedge tents. There was the Monster Wedge, surely the Cadillac of lodges, but way too big for any event I could imagine – short of actually having all of those folks you are constantly inviting to rendezvous actually show-up. I finally settled on a wedge tent a few sizes up – 7’x8’x6′. Now we could actually stand up inside the lodge (better for changing) and could have a camp bed (canvas mattress on the ground) – which was much better for those colder nights during winter camps.

It’s been a few years now and the larger wedge has worked out fine. I still use the diamond fly when I am packing-in or set-up as a “gear shed” or an extra lodge when I have the occasional pilgrim come out and camp with us. We now have a camp box, a few chairs, and a table – which Otter Woman assured me she needed for making meals. I was hesitant to buy one, but since she won ours in a shooting contest – what can I do? But I truly am all about supporting what keeps us well-fed in the woods. It’s a hell of a lot better than the hard tack and jerky I used to bring out when I packed-in to all of my rendezvous.

So our camp is definitely a little heavier, but certainly no worse than some other camps I have seen. I thought that we were more or less settled until last April when Otter Woman was sitting in our camp, introspectively looking across at the other camps at the event. She looked me straight in the eyes and asked innocently enough . . .

Why does their tent have an awning?

Oh, here we go again.

– Many Rifles